By Jake Morrison | Published: March 25, 2026 | Updated: March 25, 2026
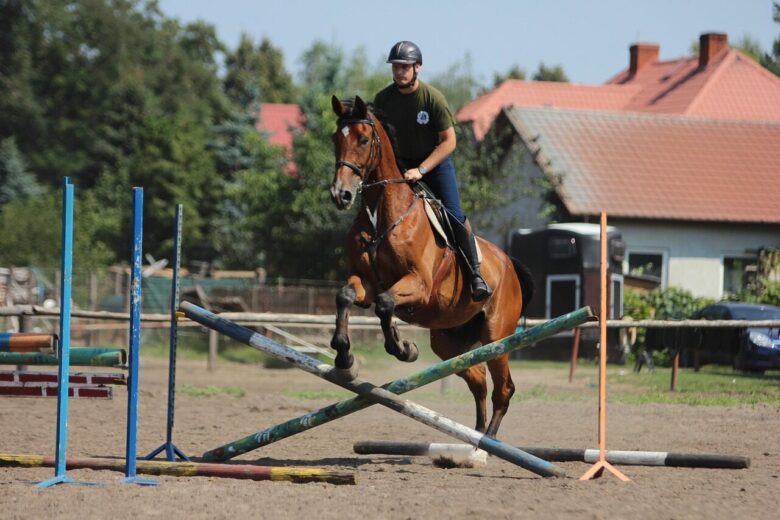
Most show jumping rounds are lost before the horse ever leaves the ground. The rider who wins is not the one with the bravest horse or the biggest scope. It is the one who can place the horse at the exact right spot, at the exact right speed, with the exact right balance — every single time.
Precision in show jumping is not about luck. It is about training systems that develop the horse’s eye, the rider’s timing, and the partnership’s ability to adjust in real time. After years of managing jumping barns and watching riders progress from local shows to national level, I have identified the specific techniques that separate consistent rounds from inconsistent ones.
The Geometry of the Perfect Distance
Show jumping is applied mathematics. The horse’s stride length, the approach angle, the takeoff point, and the fence height all determine whether the jump is clean or costly. The rider’s job is to manage these variables so the horse can do its job.
Understanding the Canter
The show jumping canter is not a fast canter. It is a collected, adjustable canter with these characteristics:
- Stride length: 3.6–3.8 meters for most horses in competition. Adjustable shorter for tight lines and longer for galloping fences
- Rhythm: Consistent 3-beat with clear suspension. No rushing, no dragging
- Balance: Weight on the hindquarters, light in the hand, shoulders free
- Impulsion: Energy from behind, not speed from the front
A horse that is on the forehand cannot jump cleanly. A horse that is rushing cannot adjust. The canter is the foundation of every good round. If the canter is wrong, the distance will be wrong.
The Five-Stride Line
A standard five-stride line in show jumping is approximately 21.5–22 meters. The horse should cover this in five even strides with a takeoff and landing stride. Precision means adjusting the canter so the horse arrives at the first fence in a position to make the line work.
Common errors:
- Adding a stride: Usually caused by a canter that is too short or too slow. The horse compresses instead of flowing
- Leaving out a stride: Usually caused by a canter that is too long or too fast. The horse stretches and flattens
- Chipping in: The horse arrives too deep and takes off from a short spot. Caused by late rider decisions or poor pace
- Launching from too far: The horse arrives too long and jumps flat. Caused by early commitment to a wrong distance
Exercises That Build Precision
Cavaletti Grids
Cavaletti grids teach the horse to regulate its own stride length and foot placement without rider interference. Set up a series of 3–5 cavaletti at distances that require the horse to adjust:
- Standard distance: 3.0–3.3 meters for trot cavaletti
- Shortening exercise: 2.7–2.9 meters to encourage collection
- Lengthening exercise: 3.4–3.6 meters to encourage extension
Ride through without touching the reins. Let the horse figure out the spacing. The horse learns to see distances, adjust stride, and maintain balance — skills that transfer directly to jumping courses.
The Circle of Fences
Set up 4–6 small fences on a 20-meter circle. Ride the circle in canter, jumping each fence as it comes. This exercise teaches the horse to:
- Jump from a turn, not just a straight line
- Maintain balance on a curved approach
- Respond to the rider’s inside leg and outside rein
- Land and reorganize quickly for the next fence
The circle removes the crutch of a long, straight approach. The rider must create the canter and the line in a confined space. This builds the adjustability that competition courses demand.
One-Stride Combinations
A one-stride combination (fence, one stride, fence) is the ultimate test of precision. The first fence sets the canter for the second. If the first is wrong, the second is almost impossible to save.
Practice with ground poles first: pole, one stride, pole. Then small verticals: 60cm, one stride, 60cm. Then increase height and complexity. The goal is to arrive at the first element in a canter that makes the second element automatic.
The Bending Line
A bending line requires the horse to jump one fence, change direction, and jump another without a long straight approach. It tests the rider’s ability to:
- Plan the line before the first fence
- Land and immediately begin the turn
- Use outside aids to control the shoulder
- Use inside aids to maintain bend and impulsion
Set up two fences on a bending line of 4–5 strides. Practice riding the line from both directions. The horse must stay balanced and straight through the rider’s body, not the reins.
Rider Position and Timing
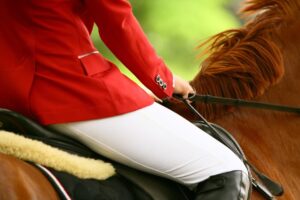
The Release
The release is the moment the rider gives the horse freedom to jump. A restrictive release — hands that do not move — punishes the horse for jumping and creates refusals or flat jumps. An excessive release — throwing the reins away — loses control and creates inconsistent approaches.
The automatic release is the gold standard: the hands follow the horse’s mouth forward and down, maintaining light contact without restricting the neck. It requires a solid lower leg, an independent seat, and trust in the horse’s ability.
The Lower Leg
The lower leg is the anchor of the jumping position. It must stay still, deep, and supportive throughout the approach, takeoff, flight, and landing. A swinging leg destabilizes the rider and confuses the horse. A gripping leg creates tension and restricts the horse’s back.
Practice without stirrups. Practice in two-point position for extended periods. The leg that can hold position without gripping is the leg that creates security without restriction.
Eye Placement
Where you look determines where you go. Look at the base of the fence, not the top. The base is the takeoff point. The top is a distraction. As you approach, your eyes should track the line to the next fence, not stare at the one you are jumping. The horse feels your focus through your body. If your eyes are looking ahead, your body is riding ahead.
Course Walking and Strategy
The Walk-Through
Before every round, walk the course on foot. Count strides between fences. Identify the technical questions: the tight rollback, the long approach to a vertical, the combination that requires a specific canter. Plan your warm-up based on the course’s demands.
Decision Points
Every course has 2–3 decision points where the round is won or lost. It might be the distance to fence 3, the turn to fence 6, or the approach to the final combination. Identify these points during your walk-through and commit to a plan. Indecision at a decision point costs rails.
Adjustability Drills
In the warm-up, practice the specific skills the course demands. If the course has a tight two-stride, practice a two-stride. If it has a long galloping approach, practice lengthening the canter. Do not just jump random fences. Jump the skills the course requires.
Common Mistakes That Destroy Precision
Chasing the Distance
The rider who stares at the fence, calculates the distance, and tries to place the horse at the perfect spot usually misses. The horse feels the rider’s fixation and either rushes or backs off. The solution is to create the correct canter and let the distance find itself. The rider manages the canter, not the distance.
Over-Riding
Constant adjustment — leg, hand, leg, hand — creates a horse that cannot settle into a rhythm. The horse needs a consistent canter to find distances. The rider who micro-manages every stride prevents the horse from developing its own eye. Set the canter, then ride quietly.
Under-Preparing
A horse that is not fit enough for the course will lose precision in the final lines. The stride gets longer, the canter gets flatter, and the distances get harder. Fitness is a precision tool. A tired horse cannot be precise.
Ignoring the Warm-Up
The warm-up is not practice. It is preparation. The canter you establish in the warm-up is the canter you will have in the ring. If the warm-up is rushed, distracted, or unfocused, the round will reflect that. Use the warm-up to establish rhythm, balance, and confidence — not to fix problems that should have been addressed at home.
FAQ
How do I develop a better eye for distances?
Practice cavaletti grids without looking down. Feel the rhythm and learn to trust it. Video your approaches and review them. Ride with a coach who calls out distances before you jump. The eye develops through repetition and feedback, not theory.
What should I do when I know the distance is wrong?
Do not freeze. Make a decision: either add leg and go forward to a longer spot, or half-halt and wait for a shorter spot. Indecision is worse than either choice. The horse can handle a slightly long or slightly deep distance. It cannot handle a rider who does nothing.
How do I build my horse’s confidence over bigger fences?
Build confidence over smaller fences first. A horse that is confident at 80cm will be confident at 1.00m if the training is systematic. Never increase height without also increasing the horse’s understanding of the question. Height is the last variable, not the first.
How important is fitness for jumping precision?
Critical. A horse that is not fit enough will lose form, rhythm, and adjustability in the final third of a course. Fitness training should include hill work, cavaletti, and gymnastic exercises that build strength without jumping maximum height daily.
Final Thoughts
Show jumping precision is the result of thousands of small correct repetitions. The horse that jumps cleanly in competition is the horse that has practiced adjustability, balance, and rhythm at home until those qualities are automatic. The rider who wins is the one who created the conditions for the horse to succeed, then got out of the way.
Train the canter. Build the exercises. Walk the courses. And remember that the jump is the easy part. The approach is where rounds are made. A horse that is well-prepared physically and mentally will perform better in competition, and that preparation starts with the environment where they live and train. If you are building or upgrading your facility, our guide to low-maintenance, high-efficiency stable design covers how to create a training environment that supports athletic development.
Disclaimer: The content on this page is for informational purposes only and is not a substitute for professional riding instruction. Jumping exercises should be introduced under the supervision of a qualified trainer who can assess your horse’s fitness, skill level, and readiness for each progression.